Core Exercise #2 deals entirely with lighting objects and lighting your scene. Lighting is one of the more difficult concepts to grasp when working in 3D software. Luckily, Cinema 4D’s lighting system is very powerful and fairly simple to use once you get the hang of it. For this exercise, you will be creating 2 images only, no animated footage.
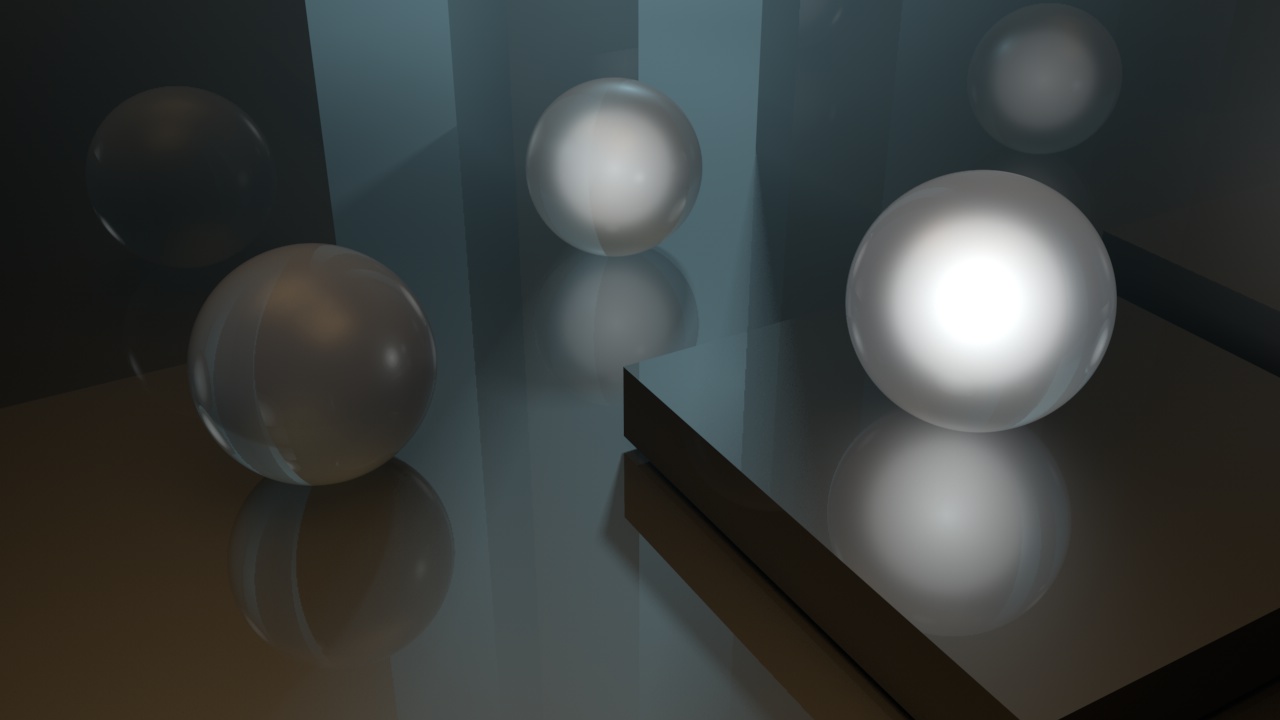
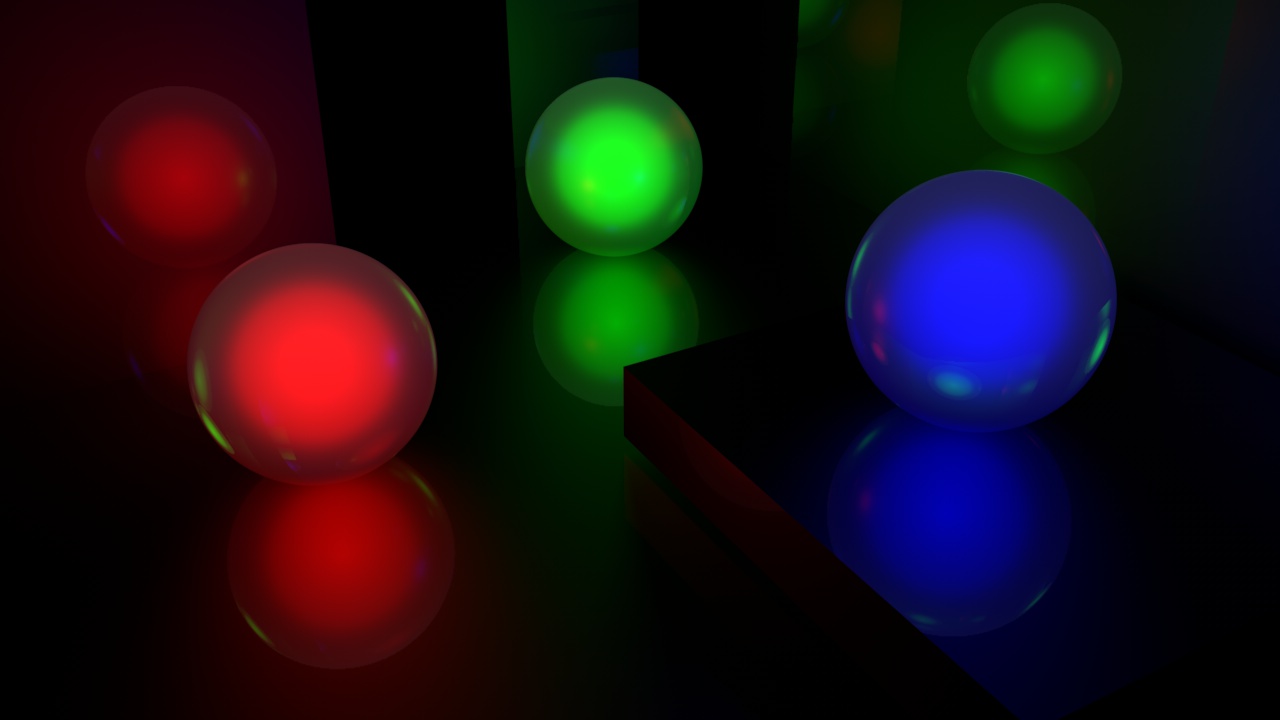
Recreate the the lighting scheme as closely as possible in the 2 images below:
Image A (click the image for a full resolution version)

Image B (click the image for a full resolution version)

Each image should be saved out as a png with resolution of 1280 x 720 pixels at 16bit. Also provide a screenshot of your rgb levels from Photoshop. (entering option-shift-4 all at once on the keyboard will allow you to marquee around the levels pallet and will save the image to your desktop.
Follow instructions from your professor for posting the images in the appropriate location.
In order to help you focus solely on lighting, we are providing the Cinema 4D base file for you here:
CoreEx-2-Lighting_BaseFile.c4d
Hints:
Both Images take advantage of the sky object, hdr image lighting, global illumination, and visible light
Both images use the Glass material found in the content browser under Presets>Visualize>Materials>Glass
Both images use a single reflective material for non spherical objects.
Remember to set Antialiasing to ‘Best’.
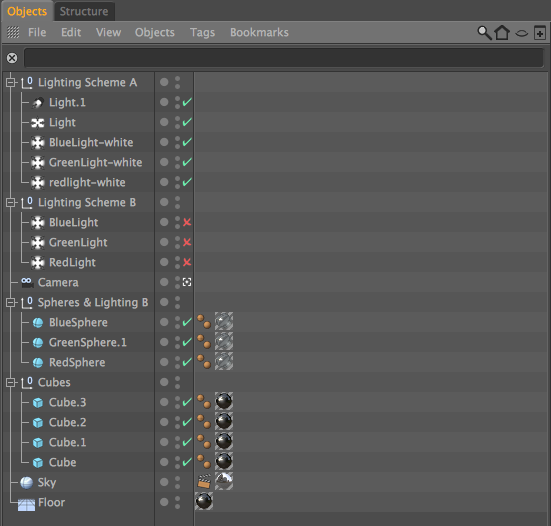
Here is a snapshot of the file hierarchy used to create the images above:

Learning Modules needed to create these images:
From Basics:
Presets
From Lighting:
HDRIs and GI
Lighting Types
Shadows
Target Light
Three Point Lighting
Visible Lights
Tips: Light Details and Visible Volumetric settings
Bonus Tip: Tip: Glowing Orb
From Materials:
Overview of Materials
Reflection, Environment and Video Backgrounds
Assigning Materials(Textures)
Material Presets
Shaders
Environment vs Reflection
From Modeling:
Primitives
