Step 1
- Download and unzip the file Img_1 to your desktop. Place it in a folder with your name followed by “exercise #1”.
Step 2
- Create a new document that is 675 x 629 pixels at 100 dpi with a white background. (file>new or com. N)
- Save this image as “your name_1.psd” inside the folder “exercise #1”
Step 3
- Open “Img 1”
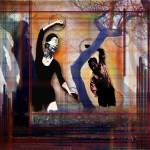
- Using the magic wand select the skirt of the female dancer. Be sure to play with the tolerance settings to get the best possible selection.
- Holding down the shift key to add to your selection, use the magic wand to select as much of the dancers legs, arms and head as possible. Remember that if you select too much you can use command-Z to go back one step. Try to select as much as possible of the figure without selecting the surrounding area.
- Still holding the shift-key, select the lasso from the tool box. Using the lasso select the rest of the female dancer. Remember that when using the lasso you need to complete the line of the selection or Photoshop will do it for you. If you accidently select the too much or not enough of an area you can hold down option key to subtract from a selection and shift to add. You can also use add and subtract from the options menu.
- When you have fully selected the female dancer look under select in the file menu and select the feather option. Set feathering to 1.0. Then copy (edit>copy or com. C) and paste (edit>paste or com. V) into the image entitled “your name_1.psd”.
- Save your work
Step 4
- Select the magnetic lasso-tool from the tool box. Using this tool select the man from the image. You may need to guess a bit as to where his legs end and the background begins. Remember that is you make a mistake you can press the delete-key to go back on registration point at-a-time.
- When you have fully selected the man, copy (edit>copy or com. C) and paste (edit>paste or com. V) into the image entitled “your name_1.psd”.
- Close Img. 1.psd.
- Save your work.
Step 5
- In “your name_1.psd” create a new layer(menu>layer>New>layer or shift com. N or the new layer tab in the layers pallet)
- Finish the image using a combinations of the paint/drawing tools. You may use vector and cloning tools create a background for your figures but only as a secondary means of creation. You may NOT use the background of the initial image. Utilize ink modes and selections tools as necessary to assist you. You may want to use several layers to maximize your options. Try to be as creative as possible. You may also add additional images and use textures from other sources if you desire.
When you have completed the exercise please turn it in a copy on Canvas under the appropriate exercise as a COMPRESSED TIF that is 72 dpi. Other formats will not be accepted.
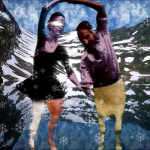
Here are few examples of finished exercises:
Some of the Modules that you will need to watch to learn how to complete this exercise are:
Brushes
Brush Libraries
Customizing a Brush
Saving a brush and preset
Using the Basic Brush
Choosing Color
Cutting and Pasting
How to Crop an Image
Paste Into, Outside and in Place
Straightening and Rotating an Image
Tool Preferences
Setting Cursor and Tool Preferences
Selections
Adding and Subtracting Selections
Feathering a Selection
Lasso Tool
Magic Wand
Magnetic Lasso
Marquee Tools
Ploygonal Lasso
Transforming


