Step 1
- Download and unzip the file Exercise 2 to your desktop. Place it in a folder with your name followed by “exercise #2”.
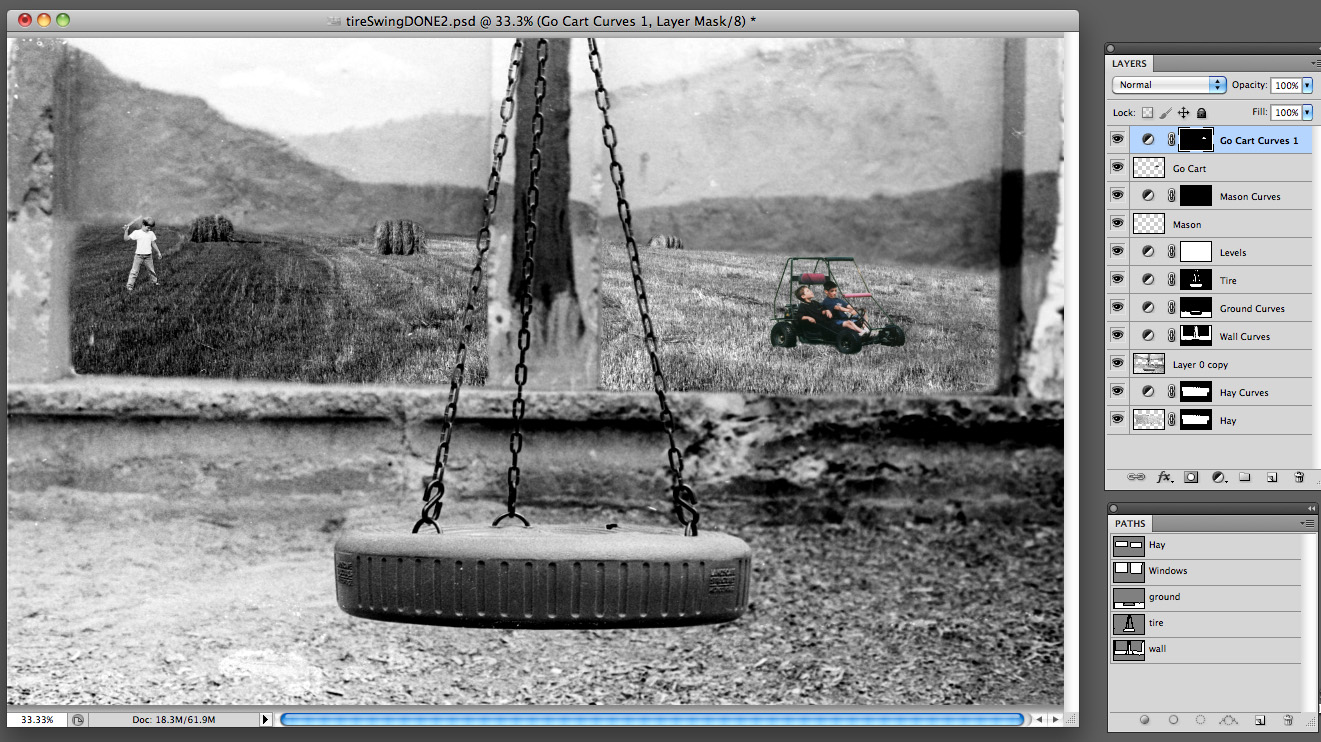
- Open all of the images in the folder entitled “Exercise #2”. Look them over and compare them to the final image “Completed_Exercise_2”. Look for potential problems such as image selections, image adjustments, sizing, cropping, cleaning, etc. Begin to think about what steps will be needed and the order in which they should be carried out.
Step 2
- Close all of the images but “hay.tif”.
- Rotate hay.tif so that the top of the image and the border are parallel.
- Using the lasso quickly select the field, the hay bales and 1/3 of the trees.
- Using a Quick-Mask, go in and clean-up your selection. Remember that you can toggle through different brush sizes using the bracket keys. You can also add to and subtract from the selection by toggling colors using the x-key.
- Convert your selection to a path
- Save the path
- Save save your work and close.
Step 3
- Open “goCart.tif”
- By adjusting the tolerance and adding and subtracting from selection (shift and option) use the Magic Wand to select as much of the go-cart as possible. You may also want to use the Marquee and the lasso tools to help refine areas.
- Clean up the rest of the selection using Quick-Mask. Remember that you can combine selection tools at anytime.
- Convert the selection to a mask in channels
- Save your work and close.
Step 4
- Open “mason.tif.”
- Using the the path tool select all the way around the figure. Do not be to concerned with the feet because they will be blended into the background later. Remember that you can add, delete and move points. Also remember that you can set the rubber-band option in the drop- down menu in the options bar.
- Save the path by double-clicking on the work-path in the path dialog box.
- Save your work and close the image.
Step 5
- Open “tireSwing.tif”
- Save your work.
- Change the image size to 16” x 10” at 200 dpi. Remember that this needs to be done in two steps – first adjust the document size then the resolution.
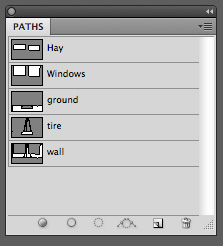
- In the image “tireSwing.tif create a path that copies as exactly as possible each of the guides outlined below. When completed, you end up with paths for: hay, wall, tire, ground, and windows.
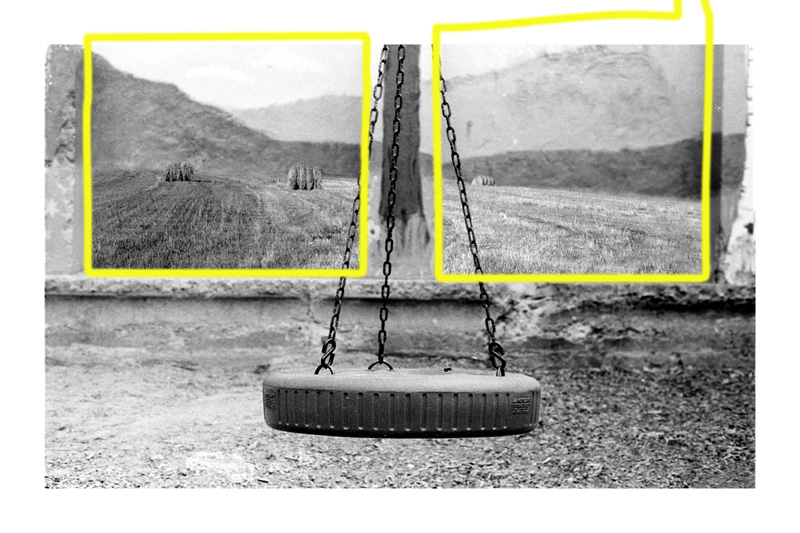
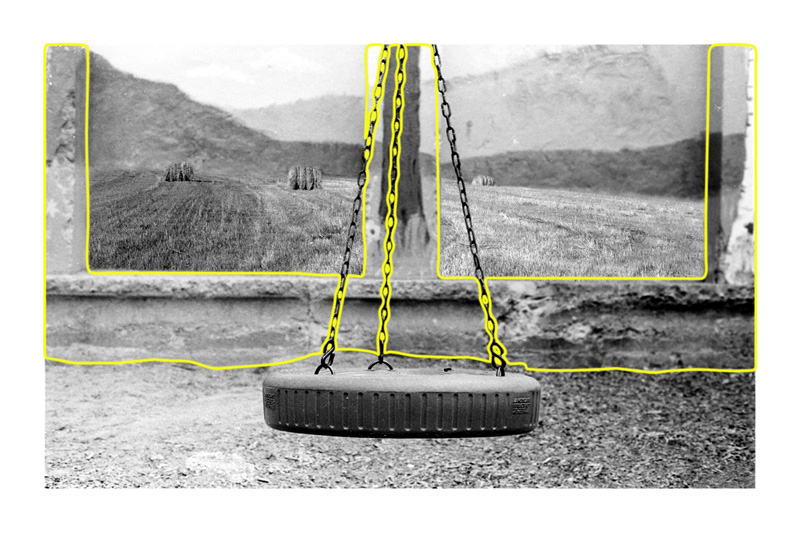

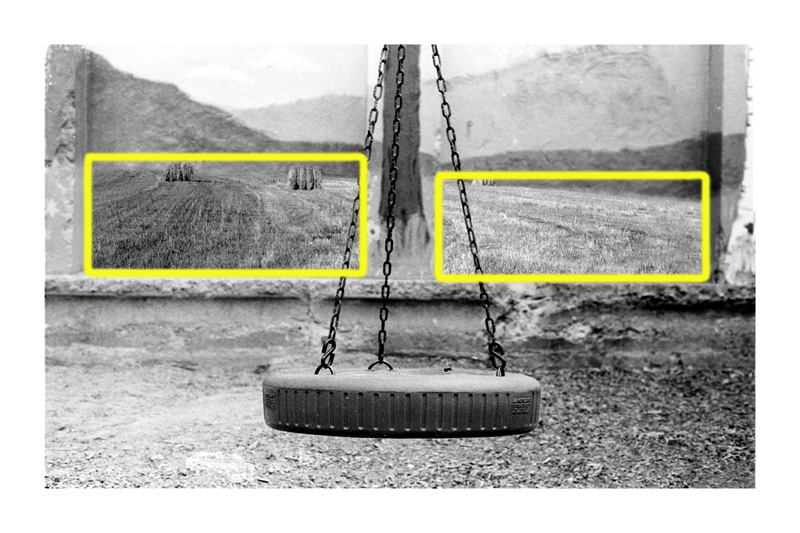
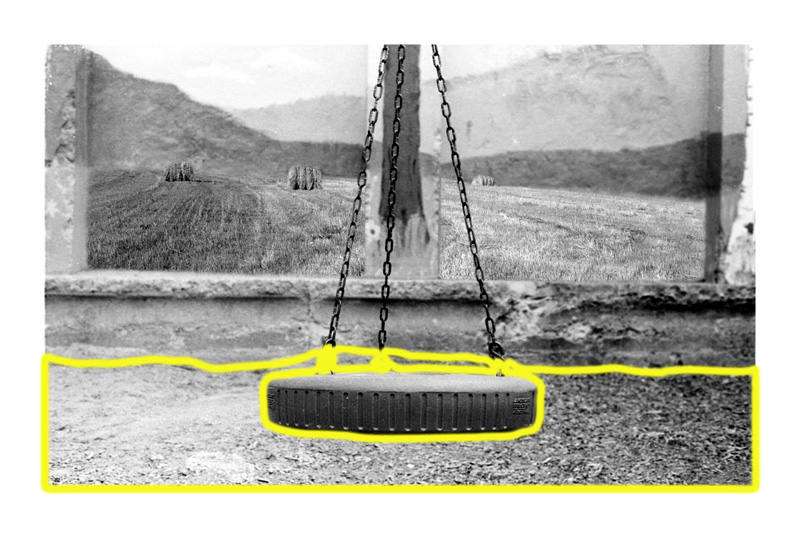
- Remember that you load one path and subtract, add or intersect other paths to it. NAME EACH OF THE SELECTIONS AS SHOWN BELOW.
- Save your work.
Step 6
- In “tireSwing.tif”, double-click on the background layer to convert it to a working layer.
- Activate the path entitled “windows”.
- Open “hay.tif” and activate the path you created in Step 1.
- Copy your selection.
- Paste your selection from “hay.tif” into your selected path“windows” minus the the path “tire”
- Using “Transform” (com. T) position it so it looks as close to the example as possible.
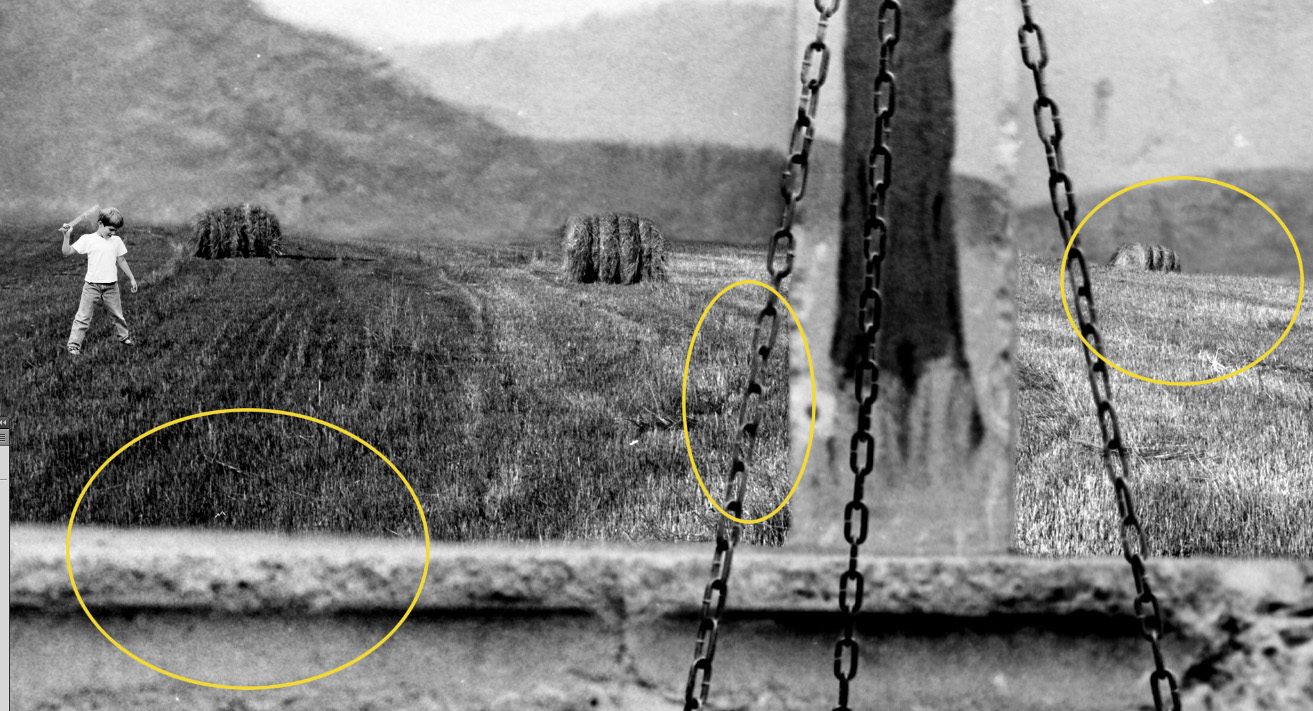
- Edit the hay bales so that it matches “Completed_Exercise_2”. BE SURE to look at the number of hay bales in the example.
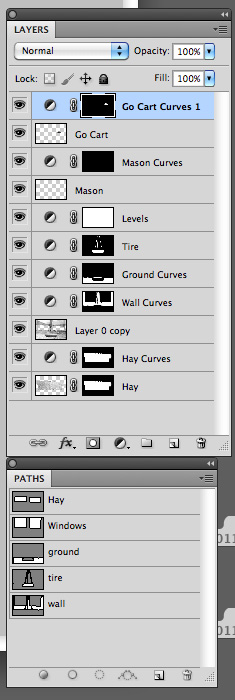
- Edit the layer mask by adding to and subtracting from the mask until it matches the example. Pay special attention to the number of hay bales, the labeling of layers, the feathering of edges, and how the background can be seen through the chain links.
- Save your work.
Step 7
- Reopen Mason.tif.
- Using the measuring tool (which is in the same box as the eye-dropper) and the info-pallet see what measure mason in the example.
- Adjust “mason” accordingly using the “image size” dialog box.
- Activate your path and copy your selection.
- Paste into “tireSwing.tif”
- Make final adjustments using the Transform tool.
- Save your work.
Step 8
- Reopen “goCart.tif”
- Using the measuring tool (which is in the same box as the eye-dropper) and the info-pallet see what measure the go-cart in the example.
- Adjust “goCart” accordingly using the “image size” dialog box.
- Activate your path and copy your selection.
- Change the mode of “tireSwing.psd” from grayscale to color.
- Paste into “tireSwing.psd”
- Make final adjustments using the Transform tool.
- Save your work.
Step 9
- Create adjustment layers and adjust the entire image.
- Create adjustment layers and adjust layer by layer
- Make sure that all of your layers are labeled properly.
Step 10
When you have completed the exercise please turn it in a copy on Canvas under the appropriate exercise as a COMPRESSED TIF that is 72 dpi. Other formats will not be accepted.
Congratulations – you have finished! Be sure to keep a copy of your work because you will continue using these images in the next exercise.
Some of the Modules that you will need to watch to learn how to complete this exercise are:
Masks
What is a gradient in a mask?
Refining a Mask
Using a Gradient in a Mask
What is a Mask?
Simple Masks
Loading a channel
Cutting and Pasting
How to Crop an Image
Paste Into, Outside and in Place
Straightening and Rotating an Image
Selections
Loading a Channel or Layer
Adding and Subtracting Selections
Converting a Selection to a Path
Quick Masks
Layers
Layers Pallet
Naming Layers and Paths
Selecting a Path or Layer

One thought on “PSD – Exercise – 2”